Purchasing
This video does a good job explaining which ESP32 to buy: https://www.youtube.com/watch?v=mnoZYlyebBc&t=602s. For prototyping, I’m picking the Lolin D32 because of its low power draw and use in breadboarding https://docs.google.com/spreadsheets/d/1Mu-bNwpnkiNUiM7f2dx8-gPnIAFMibsC2hMlWhIHbPQ/edit
Install
- Download Arduino IDE: https://www.arduino.cc/en/software
- Go to
File>Preferencesand drop https://dl.espressif.com/dl/package_esp32_index.json into libraries - Go to board manager, type in ESP 32, and install
- Download CH340 Driver: https://learn.sparkfun.com/tutorials/how-to-install-ch340-drivers/
- Get a 100uF capacitor and connect from EN to ground pin https://randomnerdtutorials.com/solved-failed-to-connect-to-esp32-timed-out-waiting-for-packet-header/
- Test out a variety of usb cables until one works (the shorter the better)
Testing
- go to
Tools > board > ESP32 Arduino > select the Lolin D32 Board - select the
Tools > Port > whichever COM port is available - upload a blank sketch (
File > New) - Try uploading the SimpleTime sketch
- Open:
File > Examples > ESP32 > Time > Simple Time ![]()
- Open:
- Put in your Wifi/password
- Put in your GMT offset
- Upload
- Go to
Tools > Serial Monitor - Tada


Pins
Check out this spreadsheet for what pins to use https://drive.google.com/file/d/1gbKM7DA7PI7s1-ne_VomcjOrb0bE2TPZ/view. This video helps explain it https://www.youtube.com/watch?v=LY-1DHTxRAk.
I2C (SDA/SCL)
For I2C connections, SDA pins of the microcontroller connect to SDA pins on the sensor, and likewise SCL connects to SCL. 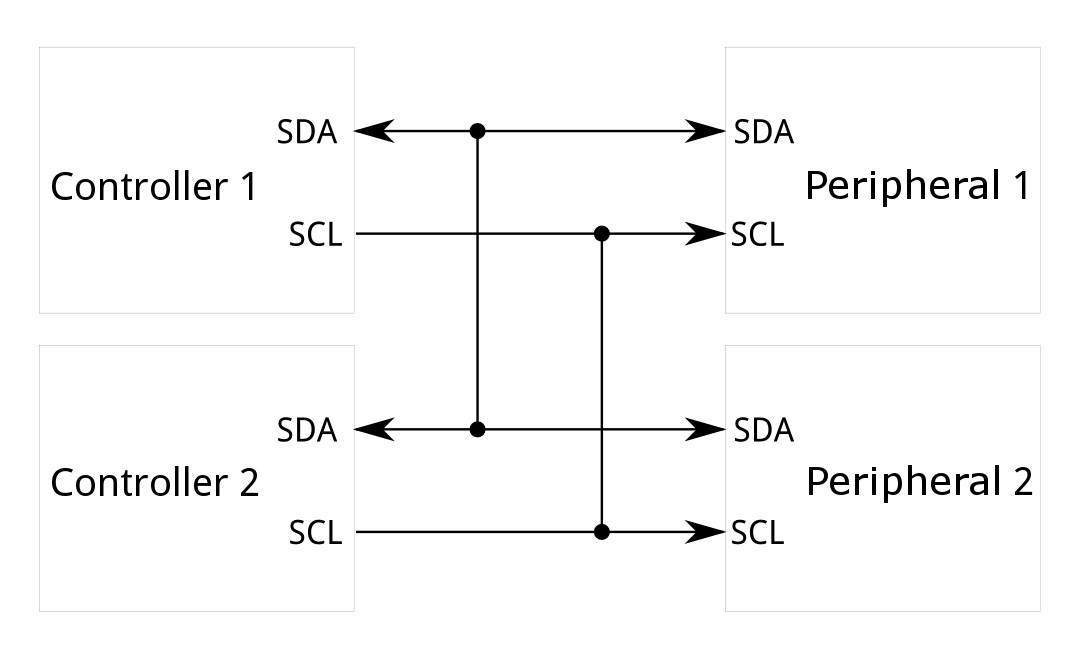 On the ESP32:
- SDA: GPIO21
- SCL: GPIO 22
Programming
Asyncrhonous Webserver
This website is a treasure trove of good info on programming with the ESP32 https://randomnerdtutorials.com/getting-started-with-esp32/. However, if you want to control things from your computer/phone or see sensor input, here’s the steps:
- Download the AsyncTSP library: https://github.com/me-no-dev/AsyncTCP
- Download the ESPAsyncWebServer: https://github.com/me-no-dev/ESPAsyncWebServer
- Unzip both files
- Drag into your Arduino Library Folder.
- In my case, my Arduino folder was in my Documents folder, so the path was:
C:\Users\Username\Documents\Arduino\libraries, but your path might be slightly different depending on where it’s located. ![]()
- In my case, my Arduino folder was in my Documents folder, so the path was:


Troubleshooting
Com port not showing up
![]()
- open up device manager and check with ESP32 plugged in
![]()
- Now check without ESP32 but micro USB cable left in computer. If you don’t notice a difference, try a different USB cable OR try putting your laptop in full power mode (not battery saver).
![]()
![]()
- Try new usb cable
- Try putting 100 uF capacitor from the enable pin to the ground pin. This tutorial suggests a 10uF capacitor, but I’ve found a 100uF cap works better: https://randomnerdtutorials.com/solved-failed-to-connect-to-esp32-timed-out-waiting-for-packet-header/


